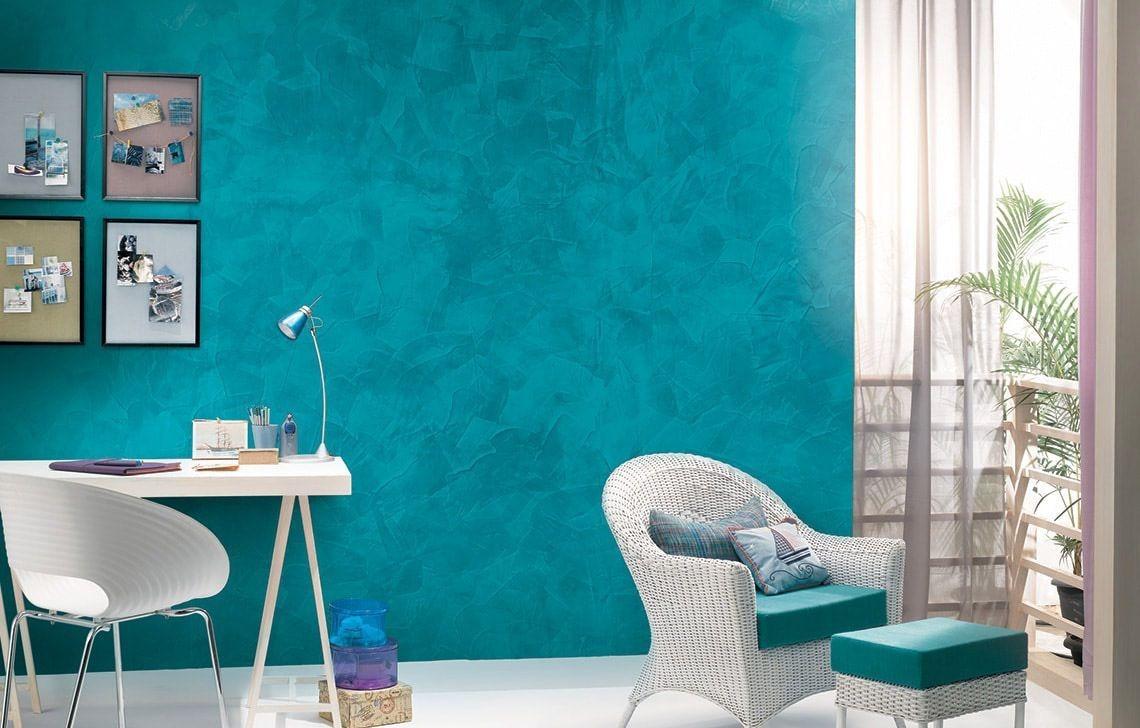
When it comes to home decoration, the way your walls look can completely transform the feel of a room. Paint texture is more than just color; it adds depth, character, and a touch of style that flat paint simply cannot achieve. From smooth, subtle finishes to bold, textured designs, understanding paint texture is essential for both DIY enthusiasts and professional decorators.
This guide will walk you through the types of paint textures, techniques to apply them, and tips to ensure your walls look flawless.
What is Paint Texture?
Paint texture refers to the surface quality of a painted wall. Unlike flat or matte finishes, textured paint creates a tactile and visual depth that can dramatically enhance a room. Textured paint can hide imperfections, create focal points, or simply add a unique design element.
Key Benefits of Using Paint Texture:
-
Hides wall imperfections and minor cracks
-
Adds visual depth and dimension
-
Enhances the aesthetics of any room
-
Offers flexibility with color and design combinations
Types of Paint Texture
There are several types of paint textures, each creating a distinct look and feel for your walls. Choosing the right type depends on your style preference, room usage, and the effect you want to achieve.
1. Smooth Texture
Smooth texture walls are the most common type. They are sleek and polished, offering a clean, modern look. While they don’t hide imperfections as well as other textures, smooth walls are ideal for a minimalist or contemporary style.
Best Uses:
-
Modern living rooms
-
Offices and workspaces
-
Bedrooms with simple décor
2. Sand Texture
Sand texture incorporates fine sand particles into the paint, giving walls a subtle, grainy feel. It adds depth without being overwhelming. This type of texture works well in high-traffic areas because it is durable and resistant to wear.
Advantages:
-
Adds subtle dimension
-
Hides minor wall flaws
-
Long-lasting and durable
3. Knockdown Texture
Knockdown texture is created by applying a layer of joint compound to walls and lightly “knocking down” the peaks with a trowel. This results in a soft, stucco-like finish.
Benefits:
-
Hides imperfections effectively
-
Creates a rustic, stylish look
-
Versatile for most interior styles
4. Orange Peel Texture
The orange peel texture resembles the skin of an orange, with a slightly bumpy surface. It is commonly used in residential homes and provides a subtle decorative effect without overwhelming the space.
Advantages:
-
Hides minor wall defects
-
Adds visual interest
-
Easy to paint over
5. Popcorn Texture
Often seen on ceilings, popcorn texture is thick and bumpy. While less common today due to modern design trends, it can still add a retro charm to certain spaces.
Uses:
-
Ceilings in living rooms or basements
-
Acoustic dampening
How to Choose the Right Paint Texture
Selecting the right paint texture requires careful consideration. Here are factors to keep in mind:
-
Room Size: Light textures suit small spaces, while bold textures can enhance large rooms.
-
Lighting: Textured walls reflect light differently. Natural and artificial lighting can change the wall’s appearance.
-
Style Preference: Smooth textures suit modern interiors, whereas knockdown or sand textures fit rustic or traditional designs.
-
Wall Condition: Textured paint can conceal imperfections better than flat paint.
Tools Required for Applying Paint Texture
To achieve a professional finish, you will need specific tools:
-
Trowel or Spatula: For applying knockdown textures
-
Roller with Special Cover: For sand or orange peel textures
-
Paint Brush: For detail work and touch-ups
-
Spray Gun: For large surfaces requiring uniform texture
-
Joint Compound: For creating depth and dimension
Techniques for Applying Paint Texture
Applying textured paint requires patience and precision. Here are some popular methods:
1. Roll-On Technique
Ideal for sand textures, this involves rolling the paint onto the wall using a textured roller. The pattern can be adjusted depending on roller type.
2. Spray-On Technique
Used for orange peel or popcorn textures, spraying ensures a consistent finish and covers large areas quickly.
3. Knockdown Technique
Apply joint compound to the wall, let it partially dry, then lightly drag a trowel to flatten the peaks, creating a unique textured look.
4. Sponge or Rag Rolling
This decorative technique uses a sponge or rag to apply or remove paint, creating a mottled, artistic texture.
Tips for Perfect Paint Texture
-
Prepare the Wall: Clean, sand, and prime the wall before applying texture.
-
Test a Small Area: Always try your technique on a small section first.
-
Work in Sections: Texture paints can dry fast, so divide walls into manageable areas.
-
Use the Right Tools: Each texture type requires specific tools for the best finish.
-
Apply a Sealer: Protect your textured walls with a clear sealer to increase durability.
Maintaining Textured Walls
Textured walls require proper maintenance to stay beautiful:
-
Dust Regularly: Use a vacuum with a soft brush attachment.
-
Spot Clean: Gently clean spots with a damp cloth. Avoid abrasive cleaning agents.
-
Repair Promptly: Fill cracks or chips with joint compound and repaint.
Common Mistakes to Avoid
-
Skipping Primer: Primer ensures better adhesion and uniform color.
-
Overworking the Texture: Excessive manipulation can ruin the pattern.
-
Ignoring Drying Times: Allow each layer to dry completely before adding another.
-
Choosing Wrong Tools: Using an incorrect roller or trowel can affect texture quality.
Conclusion
Choosing the right paint texture can transform your walls from plain to extraordinary. Whether you prefer smooth elegance, rustic charm, or subtle sophistication, understanding the types, techniques, and maintenance tips will help you create stunning results. Remember, the key is to experiment, practice, and enjoy the process of adding depth and personality to your living spaces.
With proper planning, the right tools, and attention to detail, your textured walls can become a highlight of your home for years to come.


