

Surya Namaskar, widely known as Sun Salutation, is one of the most powerful and foundational sequences in yoga. For beginners, it offers a perfect blend of stretching, strengthening, and mindful breathing. Rooted in ancient yogic tradition, Surya Namaskar connects physical movement with gratitude toward the sun — the symbol of energy, vitality, and life.
This step-by-step guide explains the 12 Steps of Surya Namaskar for beginners, making it easy to understand, follow, and practice safely. Whether you're starting your fitness journey or improving flexibility, this sequence helps build a strong foundation.
What Is Surya Namaskar?
Surya Namaskar is a dynamic set of twelve postures performed in a flowing sequence. Each pose is paired with a specific breath pattern and, traditionally, a mantra. The practice warms up the entire body, enhances circulation, and brings mental clarity.
For beginners, it’s important to learn each step slowly, understand the alignment, and build rhythm over time.
Benefits of Surya Namaskar for Beginners
Before diving into the steps, here are some benefits that make Surya Namaskar the perfect daily practice:
Improves flexibility, posture, and body balance
Boosts energy and reduces fatigue
Activates core muscles and strengthens the spine
Enhances respiratory capacity through deep breathing
Reduces stress and improves focus
Acts as a full-body warm-up for yoga or fitness routines
Supports weight management through consistent practice
With these advantages in mind, let’s explore each step.
The 12 Steps of Surya Namaskar for Beginners
Below is a clear and easy breakdown of the twelve poses, 12 Steps of Surya Namaskar for beginners focusing on proper alignment and breathing. Practicing slowly helps you understand the flow and avoid injuries.
1. Pranamasana (Prayer Pose)
How to do it:
your palms together at the chest in prayer position and relax your shoulders.
Breathing: Exhale naturally.
Purpose: This grounding pose helps center the mind and prepares the body for movement.
2. Hastauttanasana (Raised Arms Pose)
How to do it:
Inhale and raise both arms overhead. Gently arch your back while keeping the biceps close to the ears.
Breathing: Inhale.
Purpose: Opens the chest, stretches the abdomen, and improves lung capacity.
3. Hastapadasana (Standing Forward Bend)
How to do it:
Exhale and bend forward from the hips. Bring your hands toward the floor beside your feet while keeping the knees slightly bent if needed.
Breathing: Exhale.
Purpose: Stretches the hamstrings, back, and hips while calming the mind.
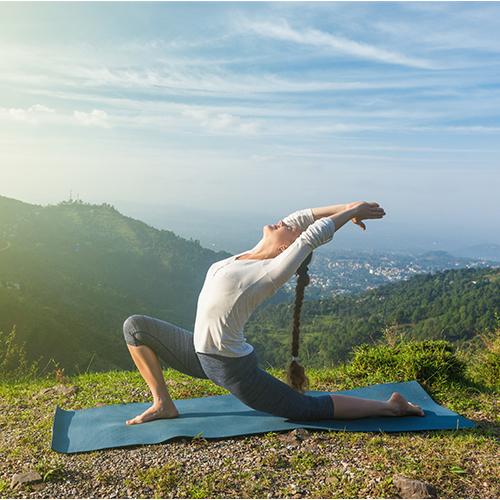
4. Ashwa Sanchalanasana (Equestrian Pose)
How to do it:
Inhale and step your right leg back. Bend your left knee and look upward while keeping the spine long.
Breathing: Inhale.
Purpose: Opens the hips and strengthens thighs, preparing the body for deeper movement.
5. Dandasana (Plank Pose)
How to do it:
Exhale and step the left leg back.
Breathing: Hold the breath briefly.
Purpose: Builds core strength and stability.
6. Ashtanga Namaskarasana (Eight-Point Pose)
How to do it:
Exhale and lower knees, chest, and chin to the floor while keeping the hips slightly raised.
Breathing: Exhale.
Purpose: Strengthens arms and prepares the spine for the next backbend.
7. Bhujangasana (Cobra Pose)
How to do it:
Inhale and slide forward. Raise your chest while keeping elbows bent and shoulders down.
Breathing: Inhale.
Purpose: Opens the chest and improves spinal flexibility.
8. Adho Mukha Svanasana (Downward-Facing Dog Pose)
How to do it:
Exhale and lift your hips high, forming an inverted “V” shape. Keep the spine long and heels moving toward the mat.
Breathing: Exhale.
Purpose: Strengthens the arms and shoulders while stretching the back and legs.
9. Ashwa Sanchalanasana (Equestrian Pose) – Other Side
How to do it:
Inhale and bring your right foot forward between the hands. Look upward with chest open.
Breathing: Inhale.
Purpose: Balances the left and right sides of the body.
10. Hastapadasana (Standing Forward Bend)
How to do it:
Exhale and bring the left foot forward. Fold forward fully while keeping the spine relaxed.
Breathing: Exhale.
Purpose: Recreates the earlier forward bend, improving flexibility.
11. Hastauttanasana (Raised Arms Pose)
How to do it:
Inhale and rise with your arms stretching overhead, gently arching back.
Breathing: Inhale.
Purpose: Opens the chest and improves posture.
12. Pranamasana (Prayer Pose)
How to do it:
Exhale and return to the prayer position, standing tall and relaxed.
Breathing: Exhale.
Purpose: Brings the sequence to a calm and mindful close.
Tips for Beginners Practicing Surya Namaskar
To get the most from your Sun Salutation practice, keep these beginner-friendly tips in mind:
Start slowly—learn each pose individually before flowing.
Focus on breathing—match movement with breath for fluidity.
Don’t force flexibility—bend your knees when needed.
Practice early in the morning for maximum energy and calmness.
Aim for 3–5 rounds initially, then gradually increase.
Listen to your body—adjust poses if you feel strain or discomfort.
Consistency matters more than perfection. With regular practice, your flexibility, strength, and stamina improve naturally.
Final Thoughts
Learning the 12 Steps of Surya Namaskar for beginners is a great way to begin your yoga journey. This simple sequence builds a strong foundation for strength, flexibility, and mindful movement. By practicing regularly with proper breathing and alignment, you can experience improved physical health, mental clarity, and overall well-being.
Sun Salutation is more than just exercise — it’s a moving meditation that aligns your body, breath, and mind. Start slow, stay consistent, and let this ancient practice guide you toward a healthier, more balanced lifestyle.